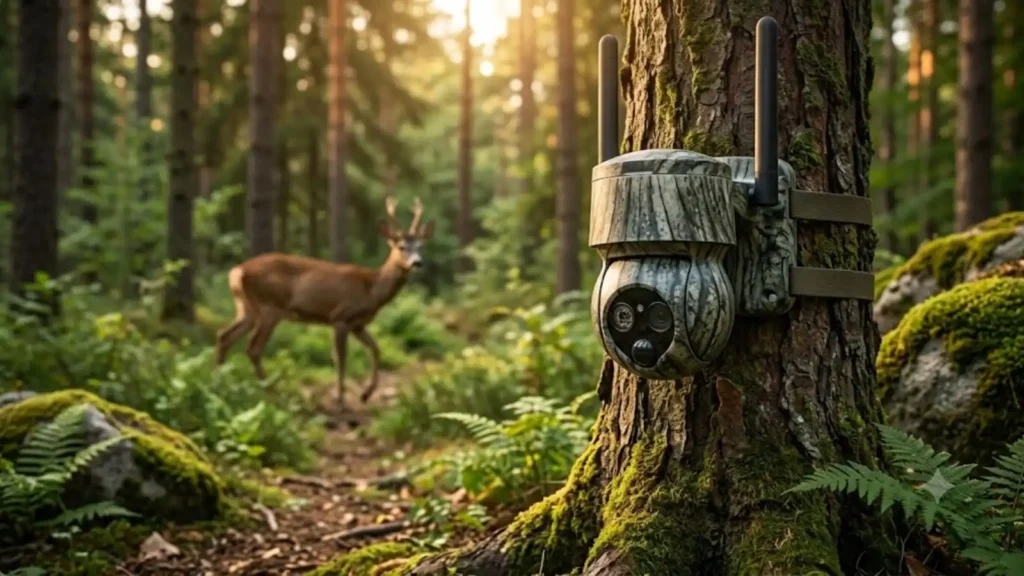
Wildlife cameras have become essential tools for ecological research, conservation projects, and biodiversity monitoring. They allow researchers to observe animals in their natural habitats without disturbing their behavior. Among the many options available today, the Vistatrik Wildlife Camera has gained attention for its high-resolution imaging, motion detection technology, and reliable performance in remote environments.
Whether you’re conducting a population survey, studying animal behavior, or monitoring protected areas, understanding how to use the Vistatrik wildlife camera correctly can significantly improve the quality of your data.
This comprehensive guide explains everything professional researchers need to know—from selecting the ideal location and configuring settings to collecting high-quality images and maintaining long-term performance in the field.
RELATED: Wilderness Wildlife Center Bulger PA
What Is the Vistatrik Wildlife Camera?
The Vistatrik Wildlife Camera is a motion-activated trail camera designed to capture photographs and videos of wildlife with minimal human interference. It uses passive infrared (PIR) sensors to detect movement and heat, automatically triggering image or video recording when an animal passes within its detection range.
Camera may include features such as:
- High-resolution image capture
- Full HD or 4K video recording
- Infrared night vision
- Fast trigger speed
- Wide detection angle
- Weather-resistant housing
- Long battery life
- Time-lapse recording
- Adjustable sensitivity settings
- SD card storage support
These capabilities make it suitable for wildlife research, conservation monitoring, forestry studies, habitat assessment, and long-term ecological projects.
Why Researchers Use Wildlife Cameras
Professional researchers rely on camera traps because they provide consistent and unbiased observations over extended periods.
Some common applications include:
- Monitoring endangered species
- Measuring wildlife abundance
- Studying migration routes
- Recording nocturnal animal activity
- Evaluating habitat use
- Identifying predator-prey interactions
- Detecting invasive species
- Monitoring protected forests
- Supporting conservation programs
- Collecting long-term ecological data
Unlike direct observation, camera traps reduce human disturbance while producing continuous data throughout the day and night.
Key Features of the Vistatrik Wildlife Camera
Before deploying the camera, it’s important to understand its primary functions.
1. Motion Detection Technology
The camera automatically detects animals using infrared motion sensors. Once movement is detected, it immediately captures photographs or begins recording video.
A fast trigger speed helps reduce missed detections, especially for fast-moving species.
2. Infrared Night Vision
Many wildlife species are most active after sunset.
The Vistatrik Wildlife Camera uses infrared LEDs that illuminate the scene without producing visible light, allowing researchers to record nocturnal animals while minimizing disturbance.
This feature is particularly useful for monitoring:
- Foxes
- Wild boars
- Deer
- Leopards
- Wolves
- Small mammals
3. High-Resolution Imaging
Image quality plays an important role in species identification.
High-resolution photos help researchers:
- Distinguish similar species
- Identify individual markings
- Estimate body size
- Analyze behavior
- Verify field observations
Clear images also improve documentation for scientific publications.
4. Weather Resistance
Field equipment often operates in difficult environments.
The Vistatrik Wildlife Camera is typically designed to withstand:
- Rain
- Dust
- Snow
- Humidity
- Temperature fluctuations
Proper installation further improves durability during long deployments.
5. Long Battery Life
One of the biggest advantages for researchers is extended operating time.
Long battery life reduces:
- Field visits
- Human disturbance
- Maintenance costs
- Equipment downtime
For long-term studies, lithium batteries generally provide more consistent performance than standard alkaline batteries.
Preparing the Camera Before Field Deployment
Proper preparation is essential for collecting reliable data.
Before entering the field, complete the following checklist.
Install Fresh Batteries
Insert new batteries according to the manufacturer’s instructions.
Avoid mixing:
- Old and new batteries
- Different battery brands
- Different battery types
Consistent power ensures reliable triggering and prevents unexpected shutdowns.
Insert a High-Quality Memory Card
Use a memory card with sufficient capacity for your research duration.
Before deployment:
- Format the card inside the camera.
- Verify storage availability.
- Perform a test recording.
- Label the card for project organization.
Proper file management reduces the risk of data loss during large research projects.
Configure Date and Time
Accurate timestamps are critical for wildlife studies.
Incorrect settings can compromise analyses involving:
- Daily activity patterns
- Seasonal behavior
- Migration timing
- Feeding schedules
Always synchronize the camera clock before deployment.
Choose the Appropriate Capture Mode
Researchers should select a recording mode based on study objectives.
Photo Mode
Best for:
- Species inventories
- Population estimation
- Animal identification
Video Mode
Recommended for:
- Behavioral research
- Social interactions
- Feeding observations
- Movement analysis
Photo + Video Mode
This combined option captures both still images and videos after motion detection.
It provides more comprehensive evidence but consumes additional battery power and storage space.
Selecting the Best Camera Location
Location selection often has a greater impact on data quality than camera specifications.
Professional researchers typically place cameras near areas with frequent wildlife activity.
Ideal locations include:
- Animal trails
- Water sources
- Forest paths
- Feeding sites
- Salt licks
- River crossings
- Mountain passes
- Nesting areas
- Game corridors
Avoid placing the camera directly toward the rising or setting sun, as strong backlighting can cause overexposed images and false triggers.
Similarly, minimize vegetation immediately in front of the sensor. Wind-blown grass, leaves, or branches may repeatedly activate the camera, filling the memory card with unnecessary images and reducing battery life.
Proper Camera Mounting Techniques
Correct mounting improves both detection accuracy and image quality.
For medium-sized mammals, mount the camera approximately 50–100 cm (20–40 inches) above the ground. For smaller animals, position it lower; for larger mammals, adjust the height accordingly.
Whenever possible:
- Secure the camera firmly to a tree or post.
- Angle it slightly downward toward the target area.
- Ensure the detection zone is unobstructed.
- Test the field of view before leaving the site.
- Lock the housing if deploying in public or high-risk areas.
A short field test can confirm that the camera captures the intended monitoring area before long-term deployment.
How to Use the Vistatrik Wildlife Camera: Complete Step-by-Step Operating Guide
Step 1: Power On the Camera
Once the batteries and SD card are installed, switch the Vistatrik Wildlife Camera to Setup or Test mode.
Most wildlife cameras include three operating modes:
- OFF – Powers down the device.
- SETUP (TEST) – Allows configuration and testing.
- ON – Begins automatic wildlife monitoring.
Always complete all configuration changes in Setup mode before activating the camera.
Step 2: Configure Camera Settings
Proper camera settings directly affect image quality, battery life, and data collection efficiency.
Image Resolution
Higher resolution produces clearer images for identifying species and individual animals.
Recommended settings:
- High Resolution – Species identification, publications, and research documentation.
- Medium Resolution – General monitoring with balanced storage usage.
- Low Resolution – Long deployments where memory conservation is important.
Professional ecological studies typically benefit from using the highest available image quality.
Video Resolution
If your project focuses on animal behavior, configure an appropriate video resolution.
Common options include:
- 1080p Full HD
- 2K
- 4K (model dependent)
Higher resolutions provide greater detail but consume more storage and battery power.
Trigger Speed
Trigger speed determines how quickly the camera captures an image after detecting movement.
For fast-moving wildlife such as:
- Deer
- Foxes
- Wolves
- Wild cats
use the fastest available trigger speed to reduce missed detections.
Recovery Time
Recovery time is the delay before the camera can capture another image after the previous trigger.
Recommended settings:
- Short delay (5–15 seconds): Busy animal trails
- Medium delay (20–30 seconds): General wildlife monitoring
- Long delay (1–5 minutes): Long-term habitat surveillance
Selecting the right interval helps balance data quality with battery and storage efficiency.
PIR Sensitivity
The Passive Infrared (PIR) sensor detects heat and movement.
Most cameras offer:
- Low sensitivity
- Medium sensitivity
- High sensitivity
Use High Sensitivity For:
- Small mammals
- Birds
- Cooler environments
Medium Sensitivity For:
- Mixed wildlife communities
- Forest habitats
- General ecological surveys
Use Low Sensitivity For:
- Hot climates
- Open grasslands
- Areas with frequent false triggers
Adjusting PIR sensitivity according to environmental conditions can significantly improve detection accuracy.
Step 3: Test the Detection Zone
Before leaving the deployment site, verify that the camera detects movement correctly.
Walk slowly across the intended monitoring area and confirm that the motion indicator activates.
Review the captured image to ensure:
- Proper framing
- Correct focus
- Suitable camera angle
- Adequate lighting
- Desired detection range
A few minutes spent testing can prevent weeks of unusable data.
Step 4: Activate Monitoring Mode
Once testing is complete:
- Switch the camera to ON mode.
- Leave the detection area immediately.
- Allow the startup countdown to finish.
- Avoid walking in front of the sensor after activation.
The camera will now begin automatic monitoring 24 hours a day.
Best Placement Practices for Professional Research
Camera placement should be guided by research objectives rather than convenience.
Experienced field researchers often:
- Face the camera north or south to reduce sun glare.
- Position the lens perpendicular to animal trails.
- Avoid loose vegetation that can trigger false captures.
- Secure the unit firmly to prevent movement caused by wind.
- Use camouflage when studying sensitive species.
- Keep human scent around the site to a minimum.
Proper placement increases both detection rates and image quality.
Reducing False Triggers
False triggers waste storage space and shorten battery life.
Common causes include:
- Moving grass
- Wind-blown branches
- Direct sunlight
- Heated rocks
- Livestock
- Passing vehicles
- Rain or snow close to the sensor
To reduce unnecessary captures:
- Clear vegetation from the detection zone.
- Avoid pointing the camera toward reflective surfaces.
- Lower PIR sensitivity in hot environments.
- Mount the camera securely.
- Test the camera after installation.
Optimizing Image Quality
Even high-end cameras require proper setup to produce research-grade images.
For the best results:
- Position the camera at the target animal’s shoulder height.
- Keep the lens clean.
- Avoid excessive digital zoom.
- Ensure the target area is well framed.
- Minimize backlighting.
- Replace damaged protective covers.
Consistent image quality simplifies species identification and later data analysis.
Managing Memory Cards Efficiently
Professional studies often generate thousands of photographs.
Good data management practices include:
- Label each SD card with a unique ID.
- Format cards inside the camera before deployment.
- Store backup copies after retrieval.
- Organize files by project and location.
- Record deployment and retrieval dates.
- Maintain a metadata spreadsheet.
A structured workflow reduces the risk of misplaced or corrupted data.
Battery Management Tips
Long-term wildlife monitoring depends on reliable power.
To maximize battery life:
- Use high-quality lithium batteries whenever possible.
- Replace all batteries at the same time.
- Carry spare batteries during field visits.
- Remove batteries before long-term storage.
- Avoid exposing batteries to excessive heat.
Researchers working in remote areas often schedule battery replacement during routine data collection visits.
Collecting Reliable Scientific Data
Images alone are not enough for meaningful ecological research.
Each camera deployment should be accompanied by detailed field records, including:
- Camera ID
- GPS coordinates
- Habitat type
- Installation date
- Retrieval date
- Camera height
- Orientation
- Weather conditions
- Research objective
- Observed species
Maintaining accurate records improves reproducibility and strengthens the scientific value of the collected data.
Ethical Considerations
Responsible wildlife monitoring minimizes disturbance to animals and their habitats.
Researchers should:
- Follow local wildlife regulations.
- Obtain necessary permits.
- Avoid placing cameras near active nests or dens unless specifically approved.
- Limit unnecessary visits to monitoring sites.
- Respect protected areas and private property.
- Ensure that camera placement does not interfere with natural animal movement.
Ethical field practices protect both wildlife and the integrity of research findings.
Routine Maintenance During Long-Term Studies
Regular maintenance helps keep the Vistatrik Wildlife Camera operating reliably.
During scheduled site visits:
- Inspect the housing for cracks or damage.
- Clean the camera lens with a soft microfiber cloth.
- Remove dirt, spider webs, or moisture from the sensor area.
- Check battery levels and replace them if needed.
- Verify that the SD card has sufficient free space.
- Confirm the date and time settings remain accurate.
- Review a few recent images to ensure proper operation.
Preventive maintenance reduces equipment failures and helps ensure uninterrupted data collection throughout the study period.
Troubleshooting Common Vistatrik Wildlife Camera Problems
Even with proper setup, researchers may occasionally encounter technical issues. The table below outlines common problems and practical solutions.
| Problem | Possible Cause | Recommended Solution |
|---|---|---|
| Camera not powering on | Dead batteries or incorrect installation | Replace all batteries and verify polarity. |
| No photos captured | Poor camera placement or low PIR sensitivity | Reposition the camera and increase sensitivity if appropriate. |
| Too many blank images | Wind, vegetation, or heat sources | Clear vegetation and adjust the camera angle or PIR sensitivity. |
| Blurry nighttime images | Dirty lens or subject moving too quickly | Clean the lens and reduce the distance to the target area. |
| Memory card error | Incompatible or corrupted SD card | Format the card in the camera or replace it with a recommended SD card. |
| Battery drains quickly | Excessive video recording or frequent false triggers | Reduce video length, lower sensitivity, and remove moving vegetation. |
Professional Tips for Better Wildlife Monitoring
Experienced researchers often achieve higher-quality data by following a few proven practices.
Use Multiple Cameras
Deploying several cameras across the study area increases detection probability and reduces sampling bias.
Multiple camera stations also provide better coverage of different habitats and wildlife corridors.
Minimize Human Disturbance
Every visit to a camera site may influence wildlife activity.
Researchers should:
- Visit sites only when necessary.
- Wear neutral-colored clothing.
- Avoid leaving food or litter.
- Minimize noise.
- Follow the same access route whenever possible.
Reducing disturbance improves the likelihood of recording natural animal behavior.
Record Environmental Conditions
Environmental factors can influence detection rates.
During each field visit, record:
- Temperature
- Rainfall
- Snow cover
- Wind conditions
- Vegetation changes
- Water levels
These observations help explain changes in wildlife activity during data analysis.
Maintain Consistent Camera Settings
Changing settings frequently can introduce inconsistencies into long-term datasets.
For studies lasting several months, maintain consistent:
- Resolution
- Trigger speed
- Recovery interval
- PIR sensitivity
- Camera height
- Camera orientation
Consistency improves data comparability across seasons and study sites.
Best Practices for Long-Term Wildlife Research
Professional wildlife monitoring projects often last several months or even years.
To ensure reliable results:
- Develop a standardized deployment protocol.
- Assign a unique ID to every camera station.
- Back up images after every field trip.
- Keep detailed maintenance records.
- Replace worn straps and damaged housings promptly.
- Regularly inspect cameras for water damage or insect nests.
- Train all team members to follow the same installation procedures.
A standardized workflow reduces errors and improves the overall quality of scientific data.
Frequently Asked Questions (FAQs)
How long does the Vistatrik Wildlife Camera battery last?
Battery life depends on image resolution, video recording frequency, environmental temperature, and battery type. Under typical field conditions, a fresh set of quality batteries can last from several weeks to several months.
Can the camera record at night?
Yes. The Vistatrik Wildlife Camera uses infrared night vision technology to capture images and videos in low-light or complete darkness without using visible flash.
What size SD card should I use?
Most users choose 32 GB or 64 GB SD cards, although supported capacity varies by model. Always check the camera’s user manual before purchasing a memory card.
Is the camera waterproof?
Most Vistatrik wildlife cameras are designed with weather-resistant housings suitable for rain, dust, and outdoor conditions. However, they should not be submerged in water.
Can researchers use the camera for scientific studies?
Yes. Wildlife cameras are widely used in ecology, conservation biology, forestry, and environmental research to monitor animal populations, habitat use, and behavior.
How often should I check the camera?
The inspection interval depends on your research goals and battery life. Many researchers schedule visits every two to six weeks to replace batteries, retrieve data, and inspect equipment while minimizing disturbance.
Conclusion
The Vistatrik Wildlife Camera is a valuable tool for professional researchers seeking accurate, non-invasive wildlife observations. When installed correctly and configured with appropriate settings, it can produce high-quality photographs and videos that support ecological studies, conservation programs, and long-term biodiversity monitoring.
Success in wildlife research depends not only on the camera itself but also on careful planning, thoughtful placement, regular maintenance, and consistent data management. By following the techniques outlined in this guide, researchers can maximize image quality, reduce equipment failures, and collect reliable datasets that contribute to meaningful scientific discoveries.
Whether your project involves monitoring endangered species, studying animal behavior, or surveying remote habitats, mastering the use of the Vistatrik Wildlife Camera will help you obtain dependable results while minimizing disturbance to wildlife.